
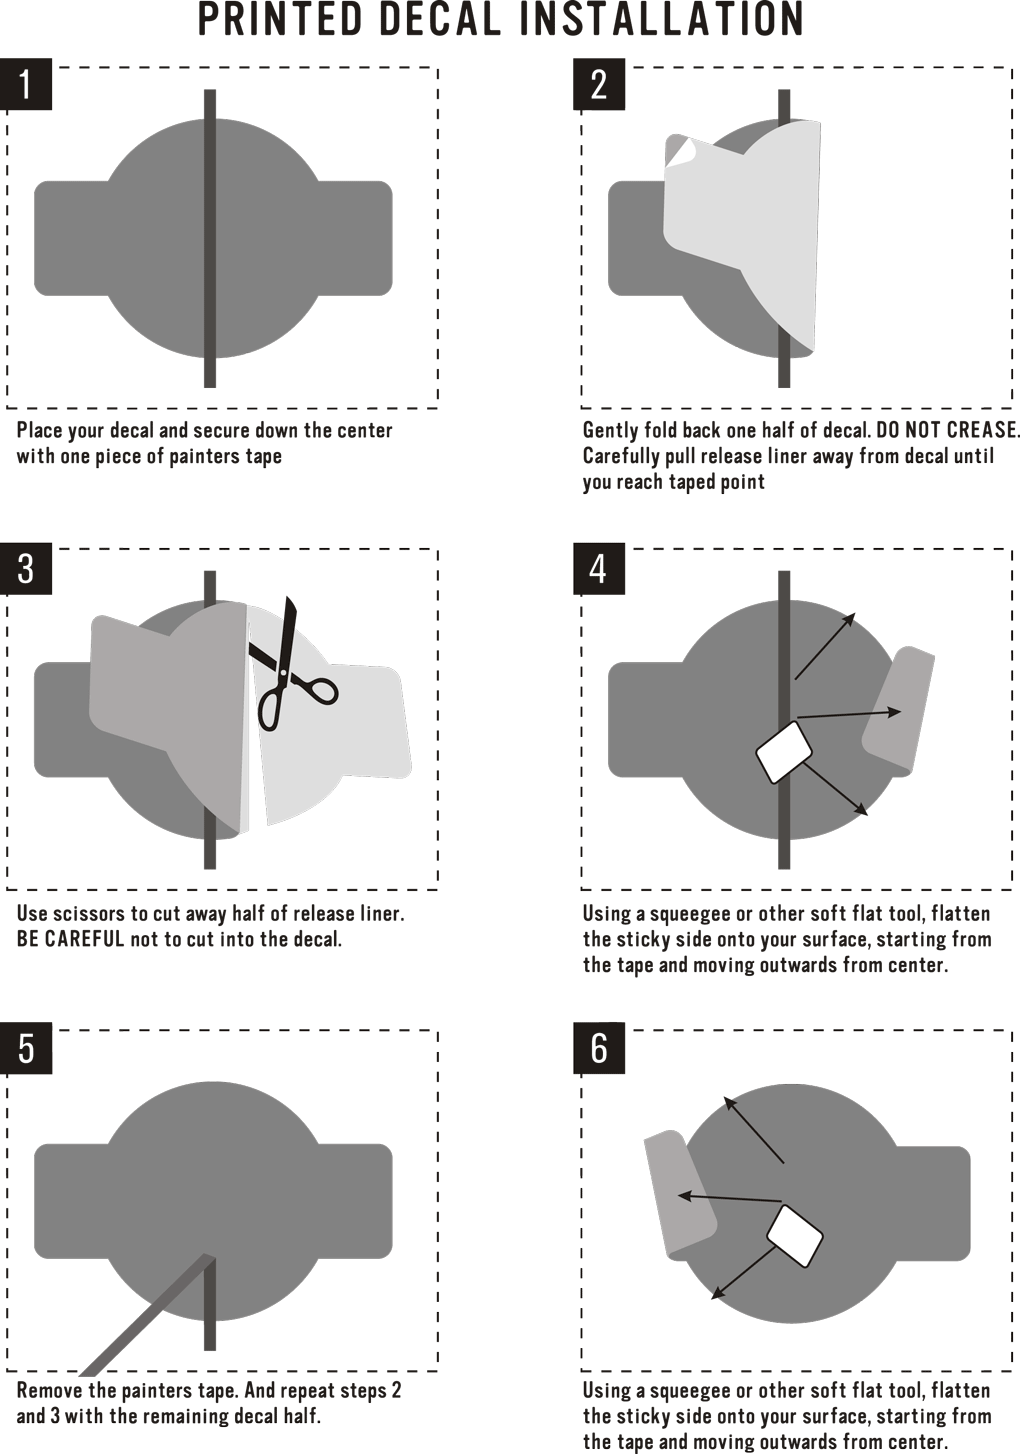
These instructions are intended for ordinary small decals on a clean, smooth, compatible surface. They are not a substitute for professional installation on vehicles, large windows, textured walls or complex multi-panel graphics.
What you will need
- Masking tape
- Tape measure or level
- Clean, lint-free towels
- Isopropyl alcohol appropriate for the surface
- A clean vinyl squeegee
1. Prepare the surface.
Wash away dirt and residue, dry completely and finish with a suitable surface cleaner. Do not use waxy household spray, polish or an oily solvent. The surface and decal should be at a moderate temperature—not baking in direct Phoenix sun.
2. Position and create a hinge.
Leave the backing and transfer tape in place. Measure from multiple reference points, then tape the decal securely along one edge to create a hinge. Step back and check alignment before exposing adhesive.
3. Remove the backing.
Flip the decal on the taped hinge. Peel the backing paper away from the transfer tape at a low angle. If a small piece remains on the backing, lower it again and press firmly before continuing.
4. Squeegee from the hinge outward.
Keep the decal slightly elevated and use overlapping strokes to apply it gradually. Firm, controlled pressure is better than allowing the entire adhesive face to fall onto the surface at once.
5. Remove the transfer tape.
Squeegee the full decal again, then peel the transfer tape back slowly at a sharp angle. If a letter lifts, lay the tape down and squeegee that area again.
Know when to stop.
Very large graphics, cold or extremely hot surfaces, compound curves, rivets and high-value finishes increase risk. Professional installation is usually less expensive than replacing a damaged graphic.